
Diaper Genie Instruction Manual: A Comprehensive Guide
Welcome! This comprehensive guide provides detailed instructions for your Diaper Genie, ensuring optimal performance and hygiene. Access downloadable resources like specification sheets and owner’s manuals.

Congratulations on choosing the Diaper Genie system, a revolutionary approach to diaper disposal designed for modern parenting! This innovative system effectively controls odors and simplifies the often-messy task of managing soiled diapers. The Diaper Genie isn’t just a container; it’s a complete hygiene solution engineered to keep your nursery fresh and clean.
Unlike traditional diaper pails, the Diaper Genie utilizes a unique “Drop & Lock” mechanism and specialized refill cartridges to seal away waste and minimize unpleasant smells. This system significantly reduces the frequency of trips to the outside trash, offering convenience and discretion. The Diaper Genie is designed to seamlessly integrate into your daily routine, providing a hygienic and efficient solution for managing diaper changes.
This manual will guide you through every aspect of the Diaper Genie, from initial setup and cartridge installation to troubleshooting and maintenance. We’ll explore the various models available and how to select the right cartridge for your needs. Discover how to maximize cartridge capacity and maintain optimal odor control, ensuring a fresh and sanitary environment for your little one. Prepare to experience a cleaner, fresher, and more convenient diaper disposal process!
Unboxing and Component Identification
Carefully unpack your Diaper Genie and verify all components are present. The box should contain the Diaper Genie pail itself, a pre-installed (or separate) odor-locking cartridge, and potentially a sample refill cartridge. Inspect the pail for any visible damage incurred during shipping. Retain the packaging for potential future use, such as returns or storage.
Key components include the pail’s body, lid with sealing mechanism, foot pedal (for hands-free operation), cartridge housing, and cartridge locking system. Familiarize yourself with the location of these parts. The cartridge housing is where the refill cartridges are inserted, and the locking system secures them in place. The foot pedal activates the opening mechanism, allowing for hygienic disposal.
Refer to the included specification sheet (PDF) for a detailed diagram illustrating each component. Ensure you have the correct parts before proceeding with assembly. If any components are missing or damaged, contact customer support immediately. Proper identification of each part will streamline the assembly process and ensure optimal functionality of your Diaper Genie system.
Assembly Instructions: Step-by-Step Guide
Begin by positioning the Diaper Genie pail on a stable, level surface. If the cartridge isn’t pre-installed, carefully insert it into the cartridge housing, ensuring it clicks securely into place. The cartridge locking system should engage, preventing accidental dislodgement. Verify the cartridge is properly seated before proceeding.
Next, attach the lid to the pail body. Align the lid’s hinges with the corresponding slots on the pail and gently press down until they snap together. Ensure a snug fit to maintain odor control. Test the lid’s opening and closing mechanism to confirm smooth operation. The foot pedal should activate the lid effortlessly.

Refer to the owner’s manual (PDF) for visual aids demonstrating each step. Double-check all connections to ensure stability and prevent malfunctions. Avoid excessive force during assembly to prevent damage to the components. Once assembled, the Diaper Genie is ready for cartridge loading and initial use. A properly assembled unit is crucial for effective waste containment.
Loading the Diaper Genie: Cartridge Installation
To begin, open the Diaper Genie pail lid and locate the cartridge housing. Gently pull out any existing cartridge, if present, using the grab handles or following the removal instructions in the owner’s manual (PDF). Prepare the new cartridge by removing it from its packaging and unwinding the film leader – approximately 6-8 inches – to initiate the sealing process.
Carefully insert the new cartridge into the housing, ensuring the film leader feeds through the designated slot and around the internal roller. Push the cartridge firmly until it clicks into place, confirming a secure connection. The cartridge locking mechanism should engage, preventing accidental dislodgement during operation.
Once installed, test the cartridge by manually rotating the roller to verify the film advances smoothly. Properly installed cartridges are essential for odor control and hygienic waste disposal. Refer to the specification sheet for compatible cartridge types. A correctly loaded cartridge ensures optimal performance and minimizes mess.
Types of Diaper Genie Cartridges & Compatibility
Diaper Genie offers a range of cartridges designed for specific pail models, ensuring optimal performance and odor control. Standard cartridges utilize a refill system, effectively sealing and containing waste. Designer cartridges often feature enhanced odor protection and unique scents for a fresher experience.
Compatibility is crucial; always verify the cartridge type matches your Diaper Genie model. Using an incompatible cartridge may result in improper sealing, odor leakage, or damage to the pail. Refer to the owner’s manual (PDF) or the product packaging for a compatibility chart. The specification sheet details specific cartridge codes for each model.

Advanced cartridges, like those with odor-absorbing carbon filters, provide superior odor control. Ensure proper installation to maximize effectiveness. Regularly check for updated compatibility information, as new models and cartridges are periodically released. Choosing the right cartridge is vital for maintaining a hygienic and odor-free environment.
Operating the Diaper Genie: Basic Usage
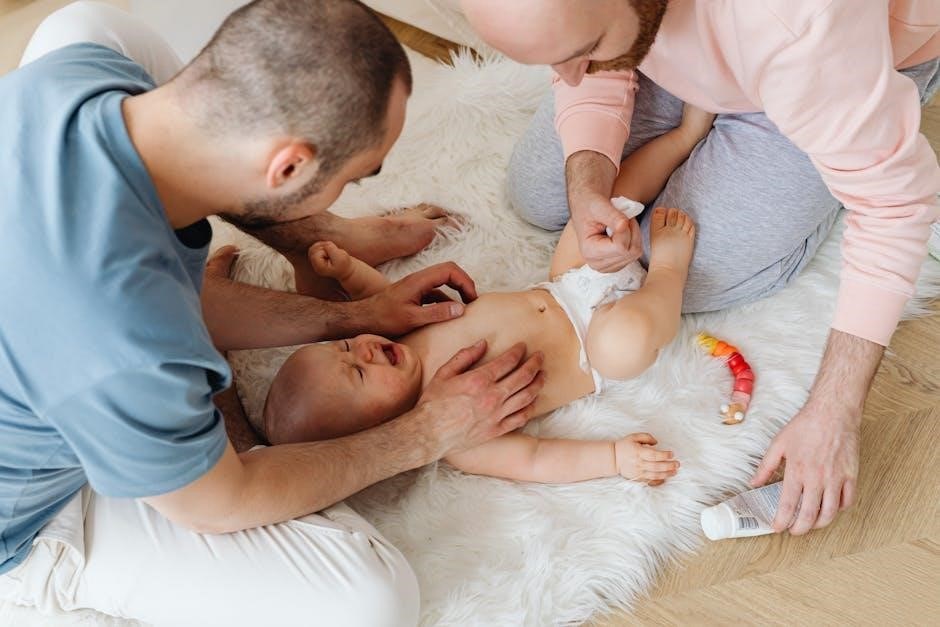
Using your Diaper Genie is straightforward. After each diaper change, simply drop the diaper into the pail opening. The “Drop & Lock” mechanism automatically seals the diaper, minimizing odor and containing mess. Avoid overfilling the pail; optimal capacity is indicated in the owner’s manual (PDF).
Ensure the cartridge is correctly installed for proper sealing function. Regularly check the cartridge level indicator to determine when a refill or replacement is needed. For maximum odor control, avoid prolonged exposure of the pail to direct sunlight or heat sources.
The Diaper Genie is designed for single-use diapers only; do not dispose of wipes, creams, or other materials in the pail. Routine cleaning (detailed in the maintenance section) will prolong the life of your Diaper Genie and maintain optimal hygiene. Proper usage ensures a clean and convenient diaper disposal solution.
The “Drop & Lock” Mechanism Explained
The core of the Diaper Genie’s functionality lies in its innovative “Drop & Lock” system. As each diaper is deposited into the pail, it passes through a specially designed chute. This chute automatically seals the diaper within a small pouch, effectively containing odors and preventing bacterial growth.
The mechanism utilizes a twisting motion, powered by the cartridge, to create an airtight knot around each individual diaper. This process minimizes exposure to air, significantly reducing unpleasant smells. The cartridge plays a vital role; without a properly installed and functioning cartridge, the “Drop & Lock” system will not operate correctly.
Regular cartridge replacement is crucial for maintaining the system’s effectiveness. Ensure the cartridge is securely locked into place. The system is designed for single-use diapers only, and attempting to dispose of other items may disrupt the sealing process. Proper operation ensures a hygienic and odor-free experience.

Maximizing Cartridge Capacity
To get the most out of each Diaper Genie cartridge, proper diaper preparation is key. Gently shake out excess waste from each diaper before depositing it into the pail. This simple step significantly increases the number of diapers the cartridge can hold before needing replacement. Avoid overstuffing individual diapers, as this can strain the “Drop & Lock” mechanism.
Ensure diapers are dropped individually into the chute, allowing the system to properly seal each one. Do not attempt to force large quantities of diapers into the pail at once. Compacting the diapers slightly with your hand before dropping them can also help maximize space within the cartridge.
Regularly check the fullness indicator on the Diaper Genie. While it’s tempting to push past the indicator, doing so can compromise the cartridge’s sealing ability and lead to odor leakage. Remember, optimal capacity is achieved through consistent, mindful usage.

Odor Control Features & Effectiveness
The Diaper Genie excels at odor control through a multi-layered system. The primary feature is the specialized cartridge, containing an odor-locking material designed to trap and neutralize unpleasant smells. This material works in conjunction with the “Drop & Lock” mechanism, which seals each diaper individually, preventing odors from escaping.
The effectiveness of odor control is directly linked to proper cartridge installation and regular replacement. Using compatible cartridges specifically designed for your Diaper Genie model is crucial. Ensure a tight seal when installing the cartridge to prevent air from bypassing the odor-locking material.
For enhanced odor control, consider the placement of your Diaper Genie. Avoid locating it near heat sources or in direct sunlight, as these can accelerate odor release. Consistent use and timely cartridge changes are paramount to maintaining a fresh and odor-free environment.
Cleaning and Maintenance Procedures
Maintaining your Diaper Genie is simple and ensures optimal performance. Regularly wipe down the exterior with a damp cloth and mild detergent. Avoid abrasive cleaners, as they can damage the plastic. The diaper pail itself doesn’t require frequent deep cleaning, but addressing spills promptly is recommended.
The most crucial maintenance task is cartridge replacement. A full cartridge can impact odor control and the “Drop & Lock” mechanism’s efficiency. Always follow the detailed cartridge replacement instructions outlined in this manual. Ensure the pail is emptied completely before replacing the cartridge.
Periodically inspect the cutting blade within the “Drop & Lock” system. While designed for durability, debris can occasionally accumulate. If necessary, carefully remove any obstructions. Proper maintenance extends the lifespan of your Diaper Genie and keeps it functioning effectively.
Troubleshooting Common Issues
Experiencing problems with your Diaper Genie? Here’s a guide to common issues. If the “Drop & Lock” isn’t functioning smoothly, ensure the cartridge is correctly installed and not overfilled. A jammed mechanism often results from attempting to force too many diapers at once.
Odor control issues typically stem from a full cartridge or improper sealing. Verify the cartridge is securely locked into place. If odors persist, consider using a higher-quality cartridge designed for enhanced odor neutralization. Regularly wiping down the interior surfaces can also help.
For blade-related concerns, check for obstructions as detailed in the cleaning section. If the pail feels unstable, ensure all components are properly assembled. If problems persist, consult the digital manual for detailed diagrams and support resources. Remember to always prioritize safety during troubleshooting.

Replacing the Cartridge: A Detailed Walkthrough
Ready to replace your Diaper Genie cartridge? Begin by unlocking the cartridge compartment, typically located at the base of the unit. Gently pull the used cartridge free, noting the direction for proper re-installation. Before discarding, tie off the bag securely to contain odors and prevent messes.
Next, remove the new cartridge from its packaging. Align the cartridge with the guides within the compartment, ensuring a snug fit. Push firmly until you hear a distinct “click,” confirming it’s securely locked in place. Always verify the seal is intact to maintain optimal odor control.
Extend the film leader by pulling the tab and following the path indicated within the unit. Properly threading the film is crucial for the “Drop & Lock” mechanism to function correctly. Refer to the owner’s manual for visual aids if needed. A correctly installed cartridge ensures continued hygienic disposal.
Safety Precautions and Warnings
Important safety information for your Diaper Genie! Keep the unit out of reach of children to prevent accidental access to the cartridge and potentially hazardous film. Never allow children to play with or operate the Diaper Genie unsupervised.
Always handle used diapers with care, practicing good hygiene by washing hands thoroughly after disposal. Do not attempt to disassemble or repair the Diaper Genie yourself; contact customer support for assistance. Avoid placing heavy objects on top of the unit, as this could damage the mechanism.
Caution: The film used in the cartridges is not a toy and poses a suffocation hazard. Dispose of used cartridges responsibly, following local regulations. Ensure the unit is placed on a stable surface to prevent tipping. Regularly inspect the unit for any signs of damage and discontinue use if necessary.
Diaper Genie Model Variations & Differences
Exploring the Diaper Genie family! Several models exist, each offering unique features. Original Diaper Genie models focus on basic odor control and disposal. Newer Elite models boast enhanced odor-lock technology and increased capacity.
Design variations include different color options and sizes to suit various nursery decors. Some models feature foot pedals for hands-free operation, while others utilize a simple push-button mechanism. The Diaper Genie One is a more recent innovation, designed for compatibility with specific diaper types and offering a streamlined design.
Key differences lie in cartridge compatibility and capacity. Elite models typically require specific Elite cartridges, while older models use standard refills. Capacity varies based on model size; larger models accommodate more diapers between cartridge changes. Always refer to your model’s specific manual for compatible cartridges and optimal performance guidelines.
Understanding “Poo Points” (Referencing Game Information ⏤ Contextual Relevance)

A playful connection! While seemingly unrelated to diaper disposal, the term “Poo Points” originates from a family game often advertised alongside Diaper Genie products. This game centers around accumulating the fewest “Poo Points” to avoid being the last monkey standing with 15 or more points.
The game’s inclusion in marketing materials creates a lighthearted association with managing diaper waste – effectively minimizing the “Poo Points” in your nursery! It’s a clever way to frame diaper changes as a challenge to be overcome, promoting the Diaper Genie as a tool for maintaining a clean and odor-free environment.
Think of the Diaper Genie as your “Poo Point” prevention system! By securely sealing and containing soiled diapers, it minimizes odor and mess, contributing to a more pleasant nursery experience. The game serves as a memorable marketing tactic, linking a fun activity with the practical benefits of the product.
Finding Replacement Parts and Accessories
Maintaining your Diaper Genie is easy! Replacement parts and accessories are readily available to ensure continued optimal performance. The most frequently replaced item is, unsurprisingly, the refill cartridge, essential for odor control and functionality.
You can find genuine Diaper Genie refills at major retailers like T.J. Maxx, and online through various e-commerce platforms. Searching online marketplaces will reveal a wide selection of cartridges, often with competitive pricing. Be sure to verify compatibility with your specific Diaper Genie model.
Beyond refills, occasionally components like the drop door or locking mechanisms may require replacement. Checking the manufacturer’s website or contacting customer support can provide guidance on sourcing these parts. Don’t hesitate to explore online retailers specializing in baby products for a broader range of accessories and potential cost savings.
Hotel & Travel Resources (Contextual Relevance — Advertisements Found)
Planning a trip with little ones? Maintaining routines while traveling is key, and that includes diaper disposal! Several resources can help you find comfortable and convenient accommodations.
Tripadvisor offers access to over 1 million hotels and motels worldwide, ranked by millions of traveler reviews. Kayak searches hundreds of travel sites to locate the perfect hotel at the right price, with verified guest reviews for peace of mind. Wyndham Hotels & Resorts provides the best available rates, complimentary breakfast, and Wi-Fi.
For last-minute deals and nearby hotels, explore options offering free cancellation for added flexibility. Google Travel simplifies trip planning by comparing flights, hotels, and attractions. Consider private rentals for more space and convenience. Remember to pack a travel-sized Diaper Genie refill or disposable bags for on-the-go diaper changes, ensuring a fresh and hygienic experience wherever your adventures take you!
Digital Manual Access & Support (PDF Availability)
Need quick access to your Diaper Genie documentation? We understand the convenience of digital resources! A comprehensive specification sheet (1.06 MB) and the full owner’s manual (789 KB) are readily available for download. These PDFs provide detailed information on all aspects of your Diaper Genie system, from assembly to troubleshooting.
Beyond the core manuals, marketing assets including large images, logos, and a color guide (ZIP — 4.84 MB) are also accessible. These resources are helpful for understanding product variations and identifying components. Should you encounter any issues not covered in the documentation, dedicated support channels are available online.

Visit the manufacturer’s website to access FAQs, video tutorials, and contact information for customer service. Ensure you have the latest version of the manual for the most accurate and up-to-date guidance on maximizing your Diaper Genie’s performance and longevity.